


Introduction
In this article, we will show you how to get started with AWS CDK and its new Python bindings to create AWS infrastructure.
AWS Cloud Development Kit uses AWS CloudFormation as engine to build and provision AWS resources. It gives you flexibility to define your architecture using any of the imperative programming language of your choice. It includes languages such as TypeScript, Java, C#, and now Python too!
You can now deploy new resources, make changes to existing infrastructure, or clean up resources using CDK similar to working with AWS CloudFormation with the concept of Infrastructure as Code (IaC).
In this example, we will be creating a S3 bucket using AWS CDK and Python. So let’s get started right away!
Prerequisites
- NPM (easiest way to install AWS CDK)
- PIP (as we are using python and we will need it to install some python dependencies)
- AWS CLI (as CDK libraries rely on it in order to deploy its resources)
See how to install AWS CLI on Mac and Windows.
Installing AWS CDK
Once you have npm installed, use command below to install cdk globally:
npm install -g aws-cdk
Once installed, you can use cdk –help to find more useful commands. See some of them listed below:
- cdk ls to list all the stacks in the application.
- cdk synth to generate CloudFormation template of your code.
- cdk deploy to deploy resources via CloudFormation stack.
- cdk destroy to clean up all resources created.
- cdk diff to see the difference between the new code generated and existing code present on AWS.
Creating Project using AWS CDK
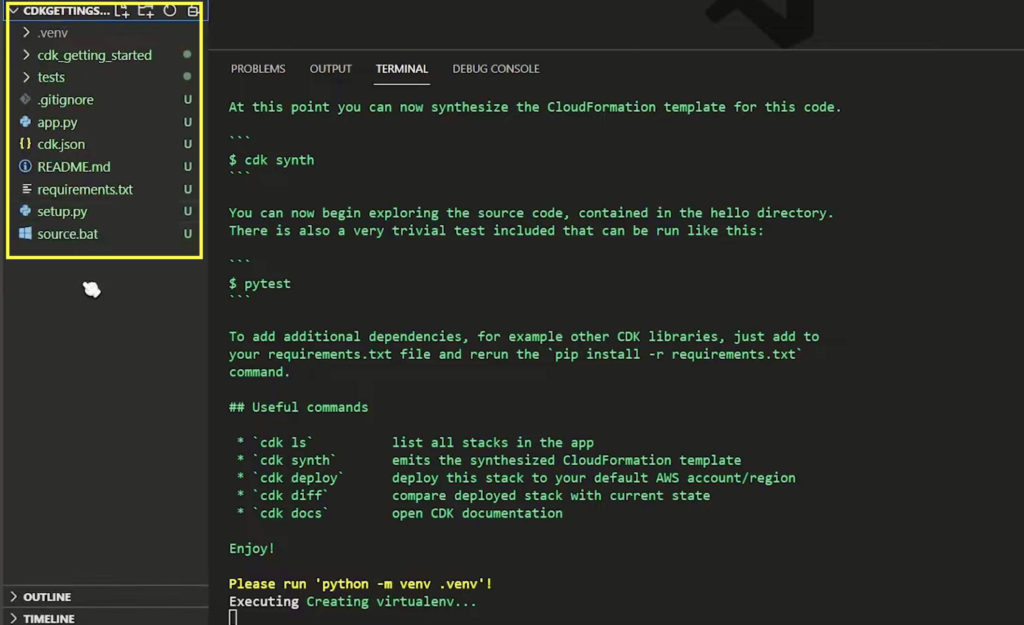
To generate a sample project in Python, run the command below:
cdk init sample-app –language pythonThis command will provision all the project files that you will need for the corresponding language.
Modify the default files created above according to your specific use-case.
Some of the important files generated includes:
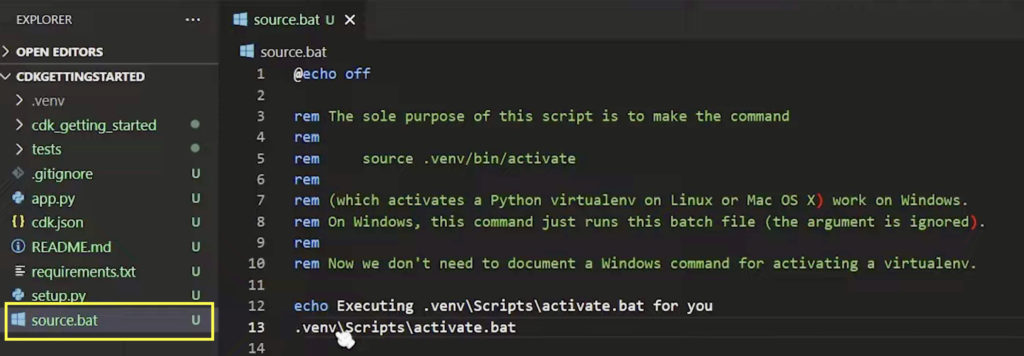
- The source.bat or source file runs a command to setup your virtual environment, to be able to install all package dependencies specific to this project.
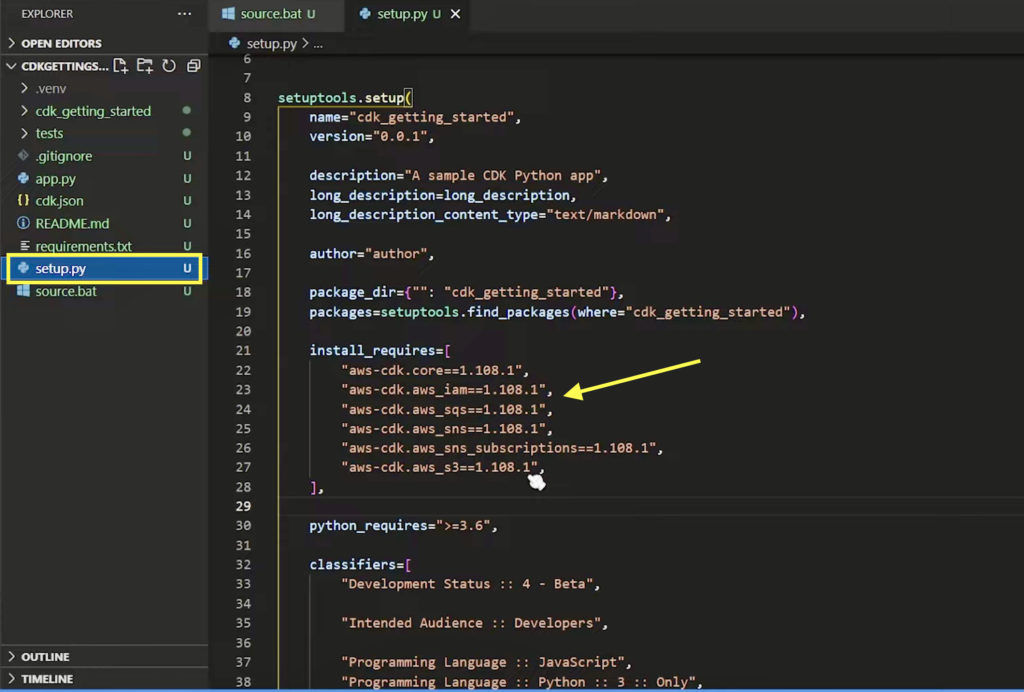
- The setup.py file has setup parameters, mostly used is install_requires section which allows you to list any dependencies needed to be installed.
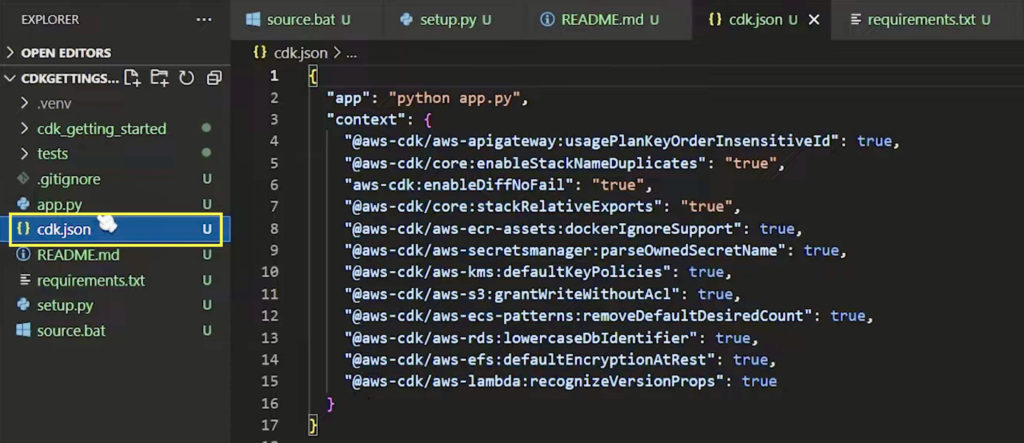
- The cdk.json file defines configuration for your cdk project.
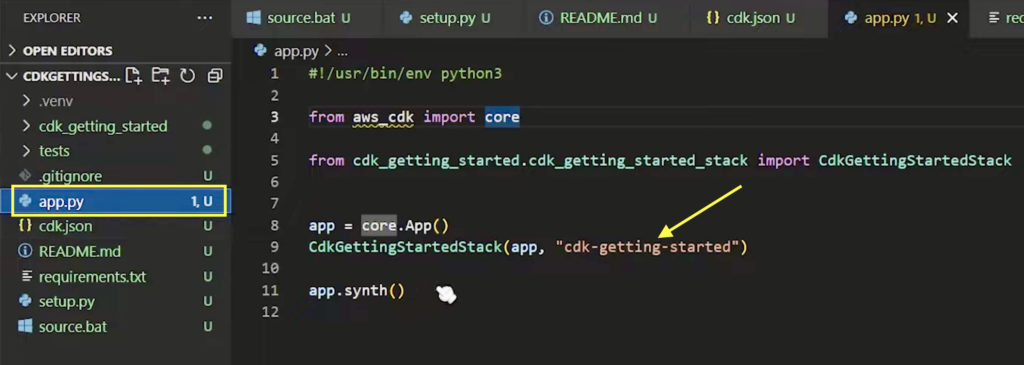
- The app.py file is the entry-point for your cdk application. Typically, a project will have only one app and it is the top-level grouping of all the stacks in your project. This file will also outline all the stacks under the app.
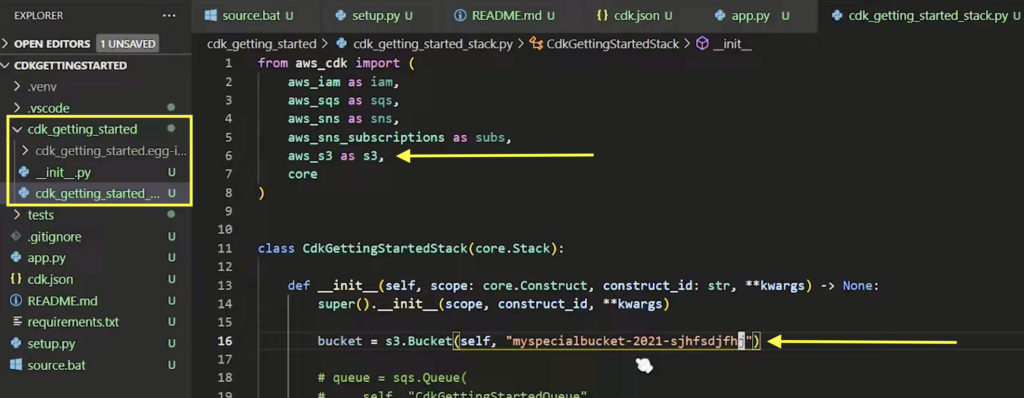
- The stack file (in my case, it is cdk_getting_started_stack.py) contains init function that contains resources we are creating.
- Modifying this file to my specific use-case
- Importing dependency aws_s3 (line 6)
- Calling aws_s3 to create S3 bucket with given name (line 16)
- Modifying this file to my specific use-case
Installing Requirements
Now, we have our stack code modified. Let’s create a virtual environment and install all dependencies.
Run source or source.bat file to activate our virtual environment using the command below:
.\source.bat
Once the virtual environment is activated, install dependencies by running the command below:
pip install -r requirements.txt
Synthesizing using AWS CDK
We have our stack code ready, and all the dependencies installed. It’s time to synthesize our stack, that is, compile all our local code into CloudFormation template. Note that you may need to run the command cdk bootstrap if it is your first time using CDK.
Doing this will also help you to make sure the code is doing what it is expected to do. In that way, we can review all the resources and its properties to be deployed by the stack. This step can be skipped if you know you haven’t made any changes to the stack since last deployment.
Run the command below to synthesize the stack:
cdk synth
Deploying using AWS CDK
To deploy our stack created above to AWS, use the command below:
cdk deploy cdk-getting-startedGenerate CloudFormation template for all stacks found in project and deploy them to AWS using the command below:
cdk deploy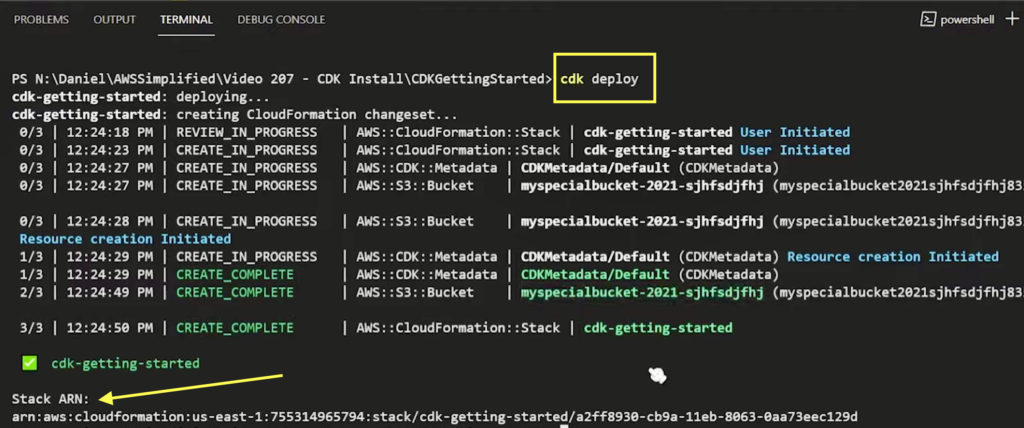
The deploy command above normally synthesizes the stacks found in your code before deploying them to AWS to reflect the latest version of the code. And therefore, cdk synth command is not the mandatory requirement.
Before you deploy, make sure AWS CLI is configured correctly for the user, all permissions in AWS are setup correctly for that user and the configuration is good to go!
Configuring AWS CLI User
Ensure that AWS user have programmatic access. Run aws configure command and enter the access keys and region (if not entered, resources will be deployed to default region).

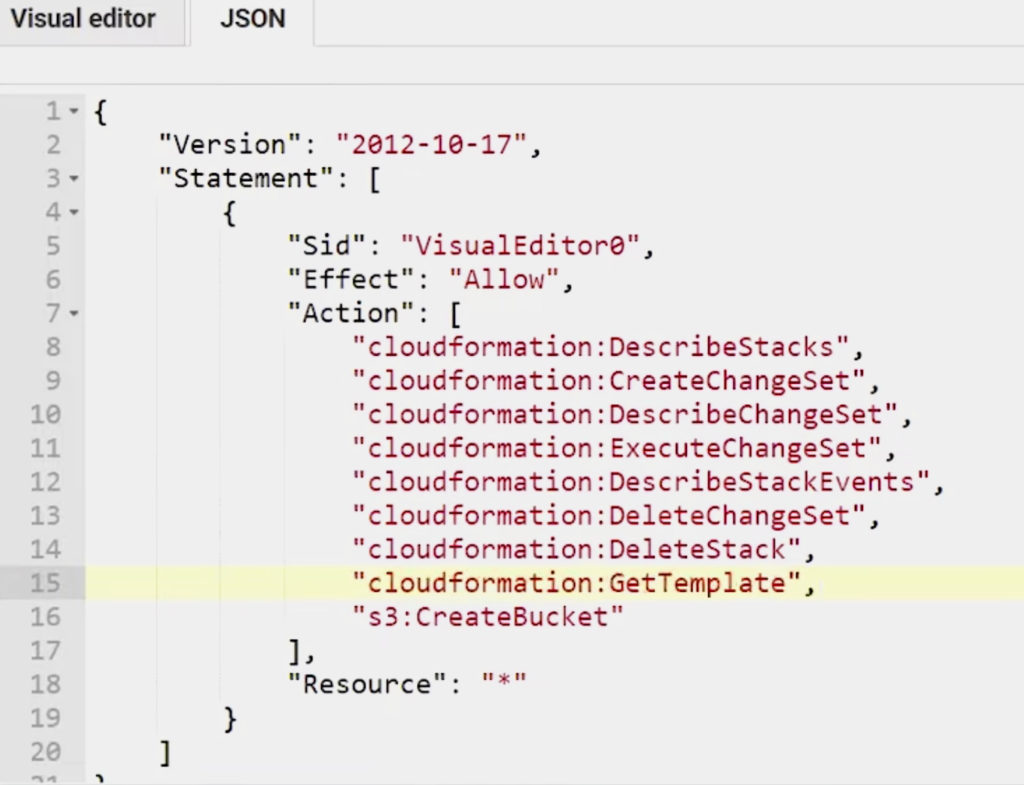
Adding Policies
If the deployment fails because of permission issue, please make sure user configured in AWS CLI has right permissions.
For this particular example, see the policy needed by the user to create S3 bucket below.
Destroying using AWS CDK
To clean up resources specific to our stack deployed, run the command below:
cdk destroy cdk-getting-started
Note that this will only delete the resources deployed using stack which do not have deletion policy enabled.
If you want to clean up all resources deployed by all the stacks in the project, you can run the command below instead:
cdk destroyConclusion
This article covered how to initialize new project, how to modify stack, synthesize and deploy the stack using AWS CDK and Python. So now – try the same example out practically or build your own code, and deploy it using AWS CDK as shown.
You may be interested in…
How to Install and Configure the AWS CLI on Windows 10
How to Install and Configure the AWS CLI on Mac


Till now I have only tried CloudFormation and Terraform on AWS. However your post is compelling enough for me to try out CDK. Thank you Jeni for an insightful post.