


Introduction to AWS Athena
Wondering what is AWS Athena and how it works? Let me give you a quick introduction…
AWS Athena is a serverless query service which can be used to read and analyze large amounts of data directly from S3 using Standard SQL.
It uses an approach known as schema-on-read, which allows you to project your schema onto your data at the time you execute a query. This eliminates the need for any data loading or ETL.
It uses Apache Hive to create, drop, and alter tables and partitions. You can write Hive-compliant DDL statements and ANSI SQL statements in the Athena query editor. You can also use complex joins, window functions and complex data types on Athena.
It follows a pay-as-you-go pricing model where you pay for the queries you run. The cost is determined by the amount of data scanned by each query executed. Amount of data scanned by the query is displayed after each execution in the console.
In this article, I will show you how to read the data stored in Amazon S3 bucket by connecting it to AWS Athena and executing some SQL queries. Buckle up!
If you prefer to learn through video, check out my YouTube video on this guide here.
How to read data from Amazon S3 using AWS Athena
Source data in Amazon S3
Before we go to how-to steps, let’s first look at the sample data in the S3 bucket we want to read…
I have two buckets created in S3, one contains raw source data to read, and another is to store the results of SQL queries executed in AWS Athena.
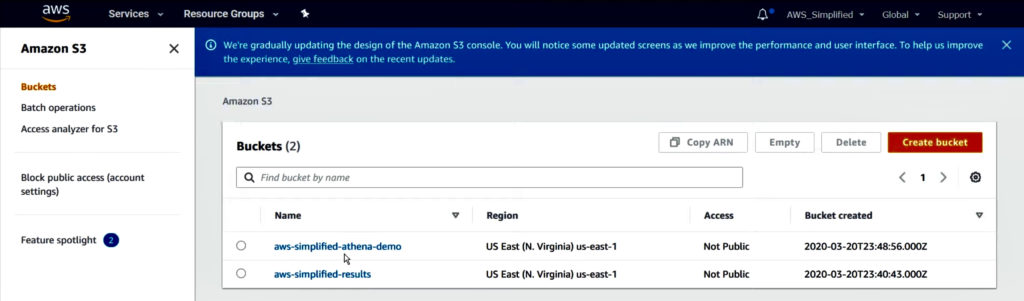
S3 bucket “aws-simplified-athena-demo” contains source data I want to query.

Source data in this bucket contains raw transaction data in JSON format. Each row has a unique ID, type of transaction, purchase amount and the date of transaction.
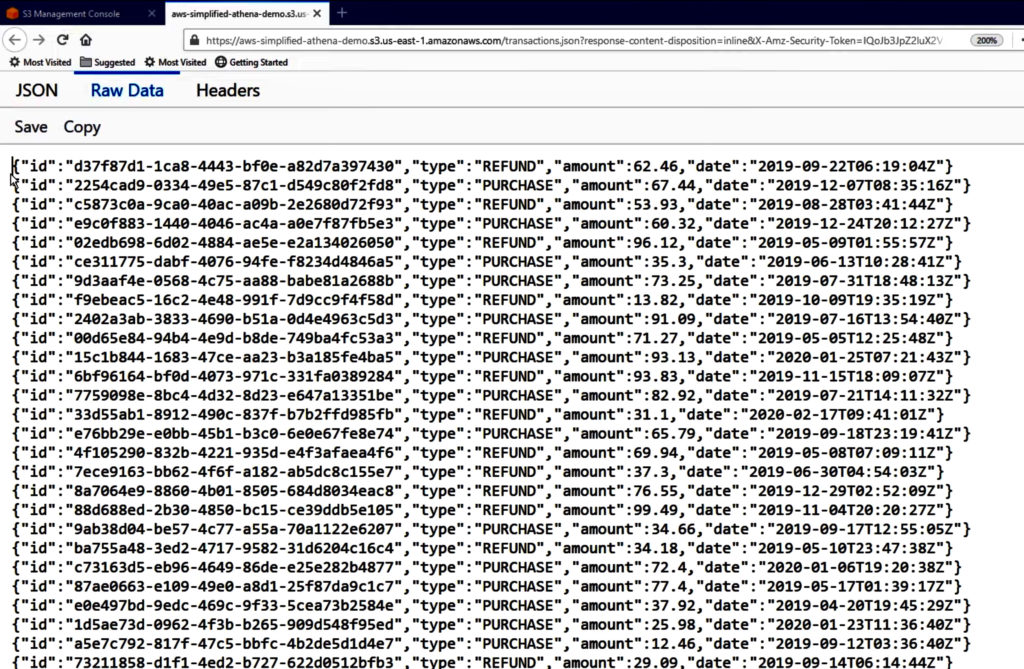
Note: Unfortunately, the classifier does not work correctly with standard JSON format. There should be just one entry per line, no commas at the end of each line and no square brackets at the start and end of the JSON array.
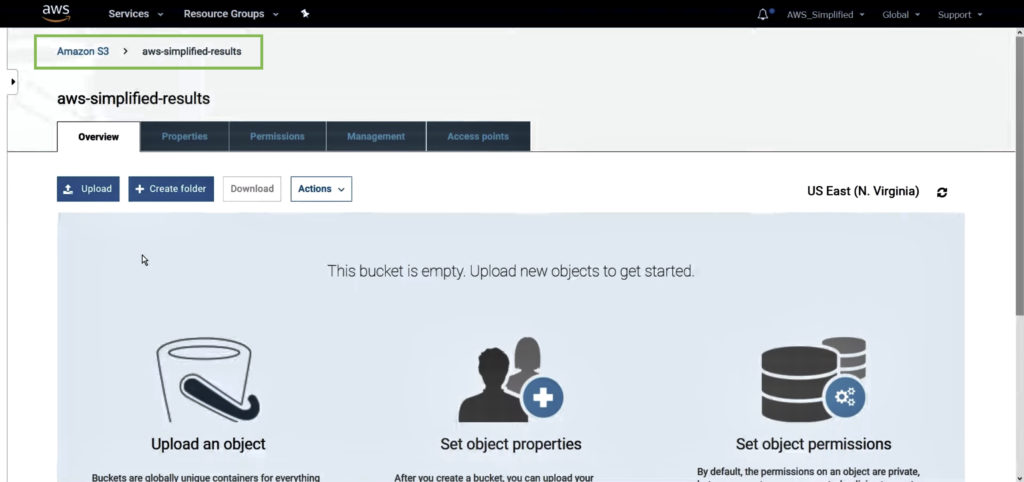
S3 bucket “aws-simplified-results” is to store the results of my SQL queries executed, which is empty as no queries are executed as of now.
You can set up some interesting use-cases on this bucket. For example, you can trigger an AWS Lambda function to execute anytime a file gets uploaded to this bucket.
Prerequisites
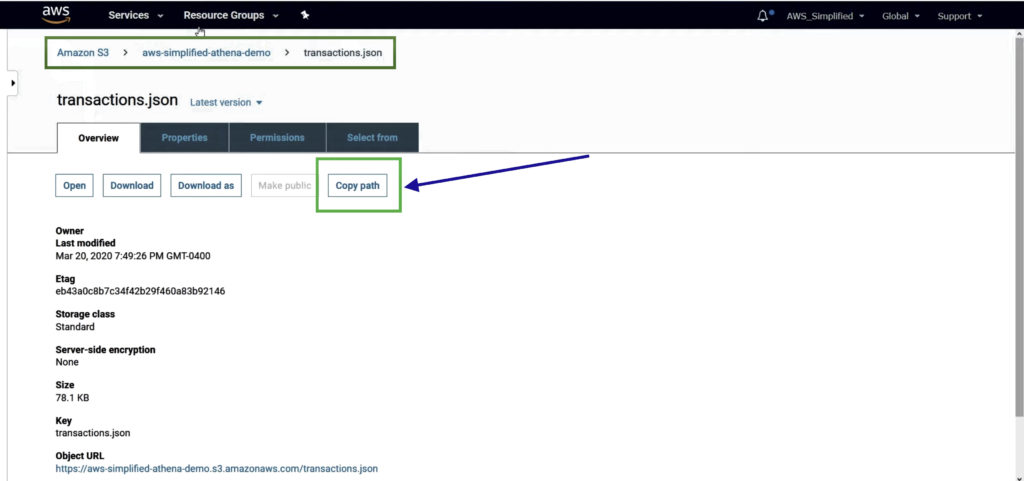
1) Copy the path of the source data file
Navigate to AWS S3 service. Go to the S3 bucket where source data is stored and click on the file.
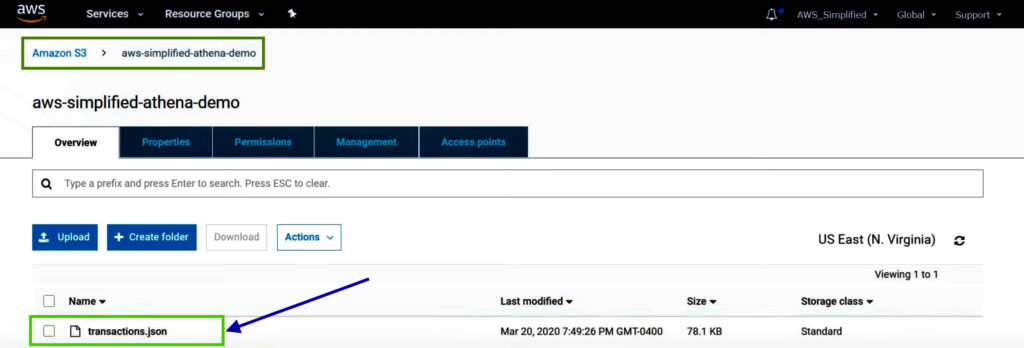
Click on the Copy Path button to copy the S3 URI for file.
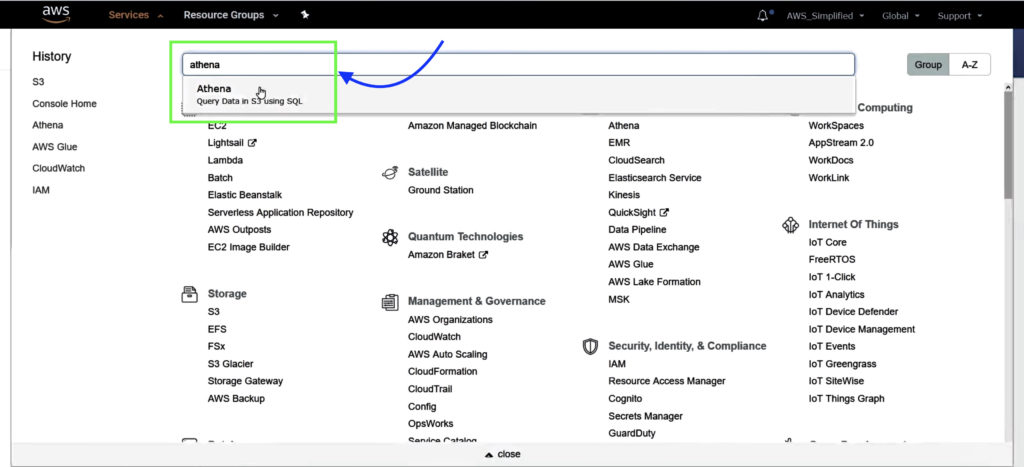
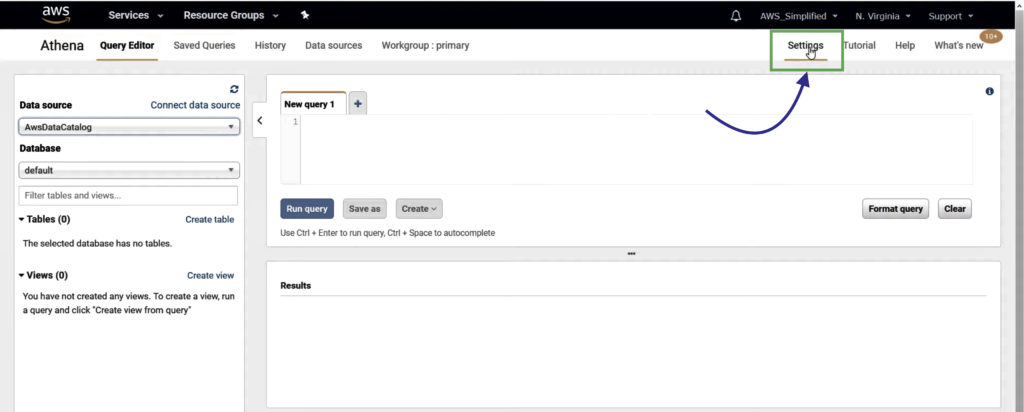
2) Configure Output Path in Athena
Navigate to AWS Athena service.
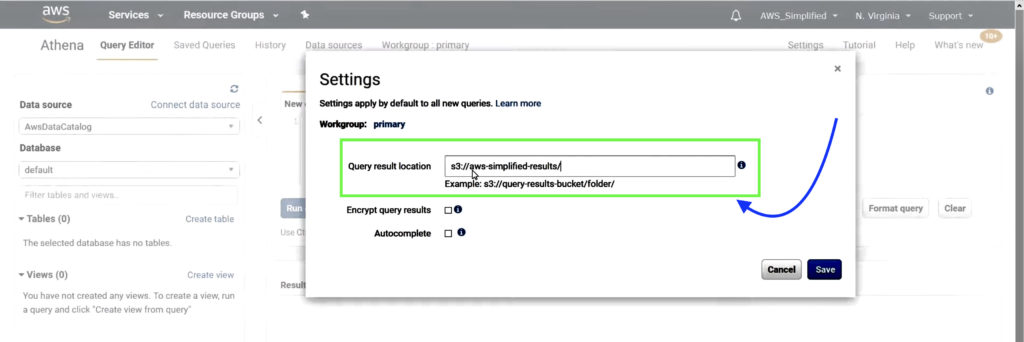
In the Settings tab on top-right, enter S3 Bucket name where results of Athena queries will be stored, then click Save.
Steps to analyze S3 data using AWS Athena Query Editor
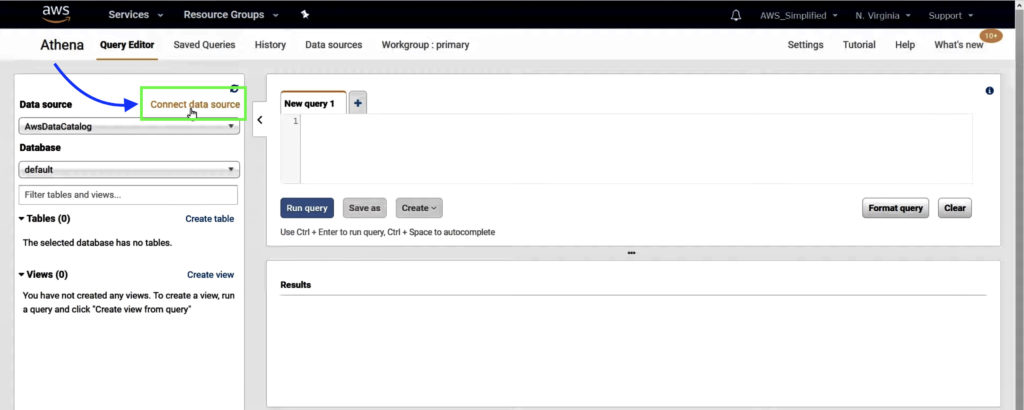
Step 1: Connect Data Source
In AWS Athena Query Editor, click on Connect Data Source.
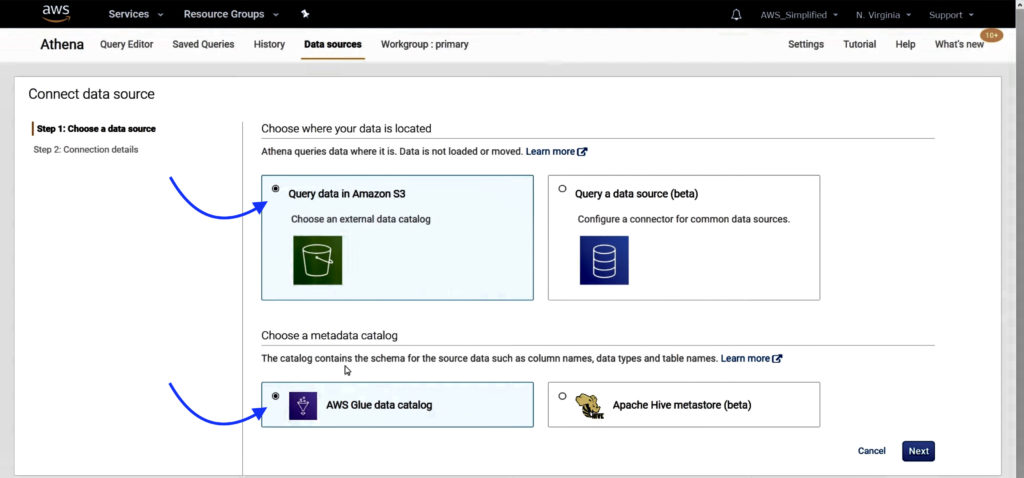
Step 2: Choose a data source
Choose where the data is located and metadata catalog. We are going to use query data in Amazon S3 since that’s where our raw data is and AWS Glue data catalog for getting schema for the source data.
Click on the Next button.
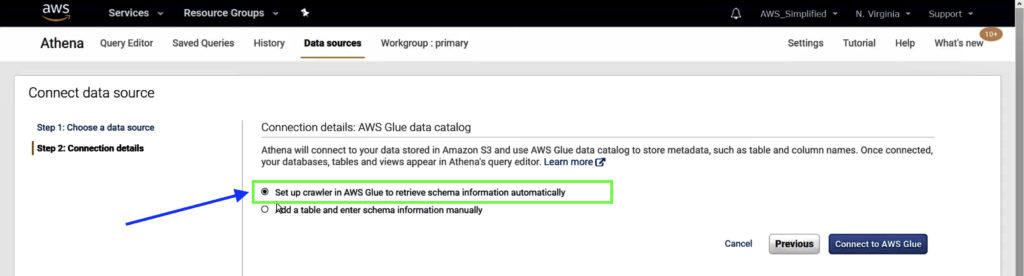
Step 3: Configure Connection details
Select the first option to set up AWS Glue Crawler to retrieve schema for source data automatically.
Click on the Connect to AWS Glue button. This will open up a new tab to set up a new crawler in AWS Glue.
There are two ways to get the schema for your source data. First way is to use AWS Glue Crawler which will crawl your data and inspect the JSON objects that are within the source data S3 Bucket, connecting that to a pseudo table in AWS Athena so that you can query over the columns in your JSON file. Alternative way is to use a manual process where you can create tables in Athena, manually specifying the names and the types of each column.
Before using one of the above two ways, keep in mind that you will incur additional cost by using AWS Glue Crawler whereas there is no cost associated with the manual process! For more information on pricing, see https://calculator.aws
You may also be interested in…
Amazon S3 Select vs Athena – Whats the Difference?
AWS S3 Core Concepts – The Things You Need To Know
AWS S3 Object Lambda Tutorial
S3 Standard vs Intelligent Tiering – What’s the difference
In this example, we are going to use AWS Glue Crawler to identify schema for source data automatically.
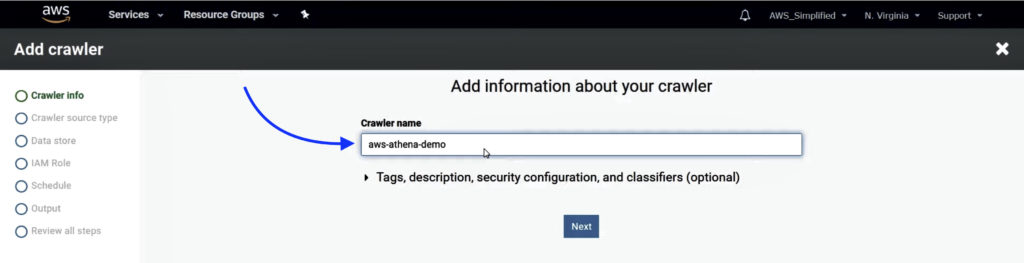
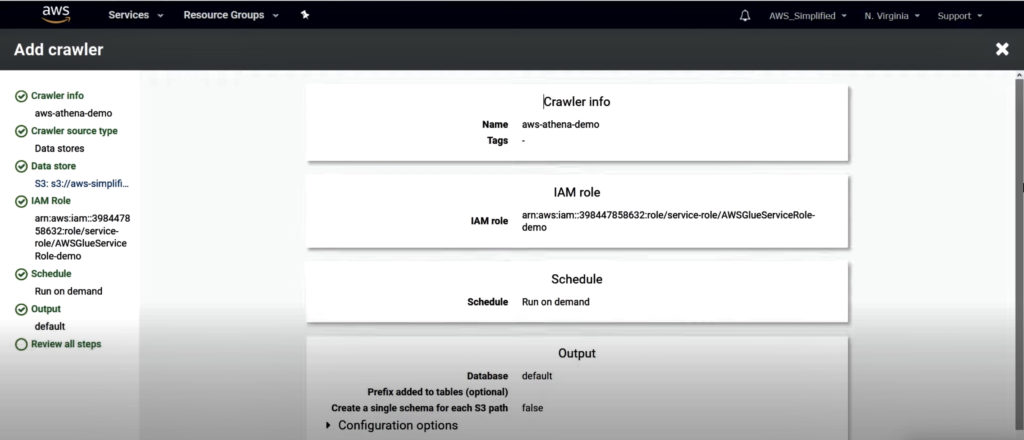
Step 4: Create crawler in AWS Glue
In the new tab opened in Step 3, follow the instructions below to set up new crawler:
1. Enter the crawler name and click Next.
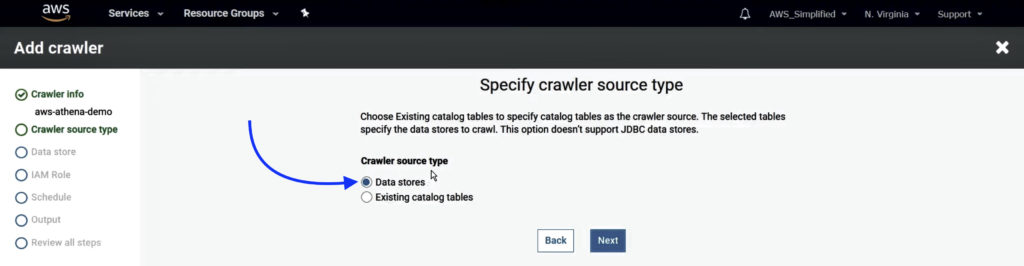
2. Select Data Stores as the crawler’s source type and click Next.
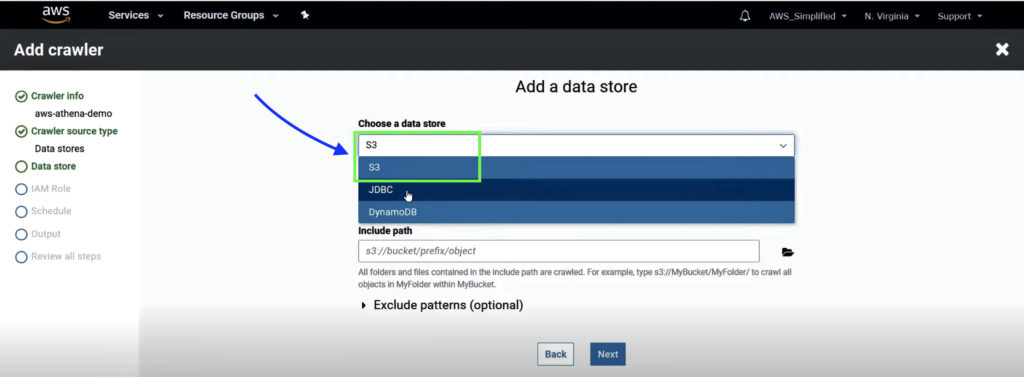
3. Select S3 as the data store and enter the path of S3 bucket where source data is stored. Click Next.
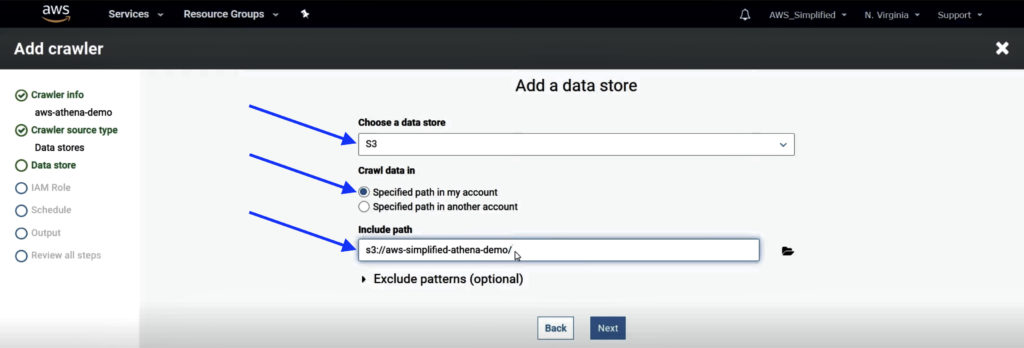
You can either enter exact path to point it to specific file (for example, “s3://aws-simplified-athena-demo/transactions.json”) or leave it at the path to the folder which might contain one or multiple files (for example, “s3://aws-simplified-athena-demo/”). With the latter option, crawler will read over all files located under that folder path to retrieve schema.
You can also connect to other data sources such as databases using the JDBC connector option available or to a DynamoDB directly using this too.
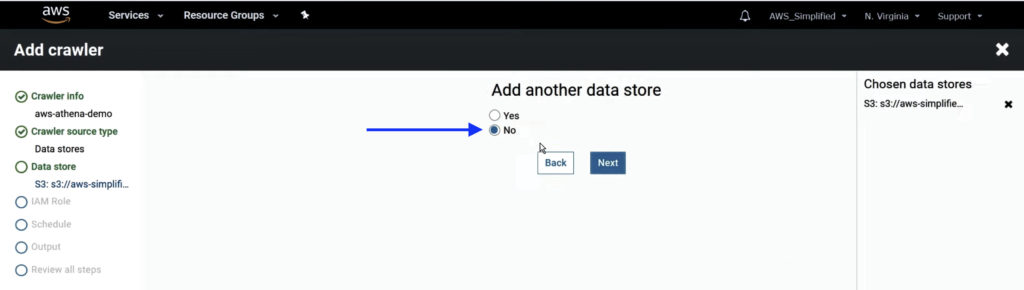
4. Select No for adding another data store and click Next.
5. Select Create an IAM role and enter the role name suffix. Click Next.
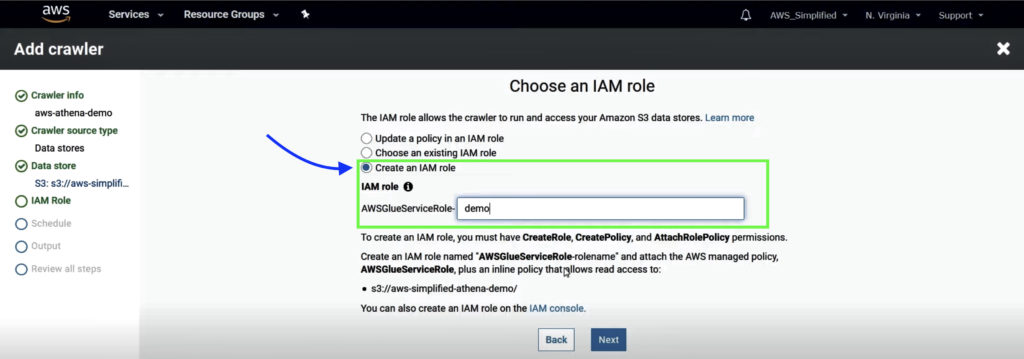
If you are creating a new IAM role, ensure that you have permissions to CreateRole, CreatePolicy, and AttachRolePolicy.
If you already have an existing role you want to use, you can choose from existing roles or update policy in an IAM role.
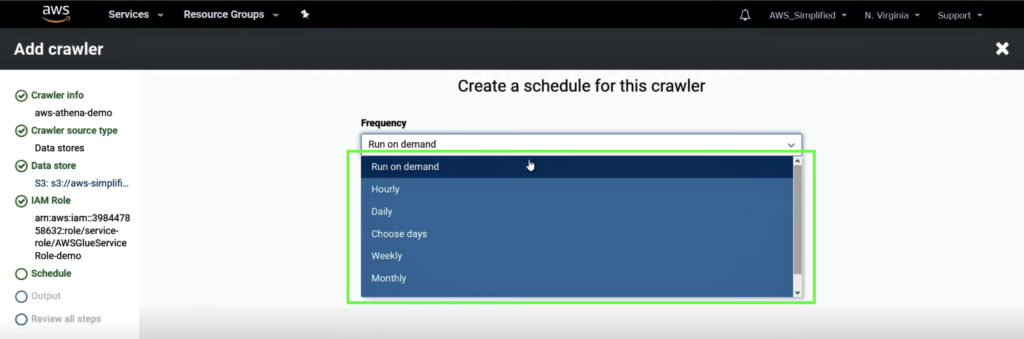
6. Select Run on Demand option as frequency to run crawler and click Next.
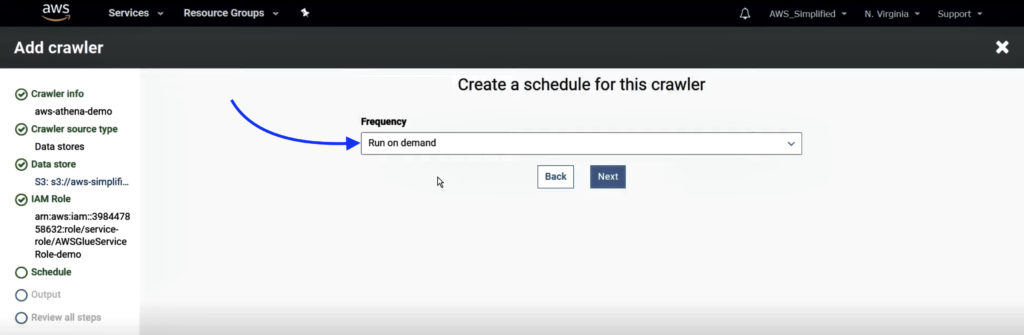
You can also set to run on schedule options available or create a custom schedule. But remember you will incur charges every time the crawler runs.
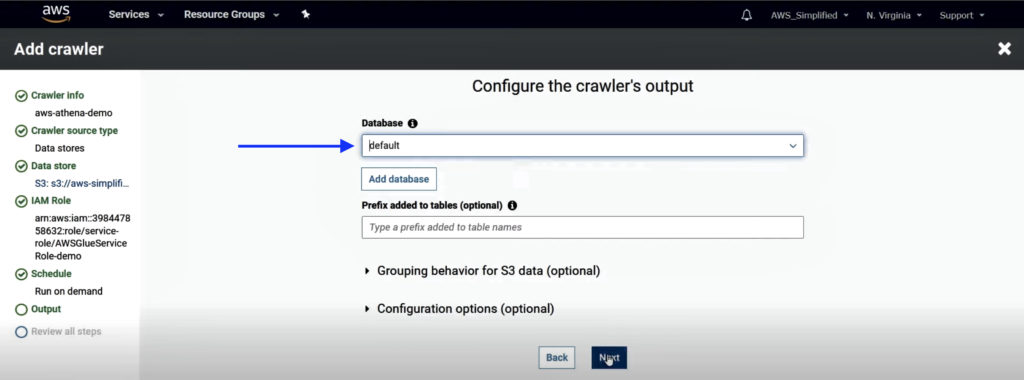
7. Leave the output database as default and click Next.
8. Review all steps and click Finish.
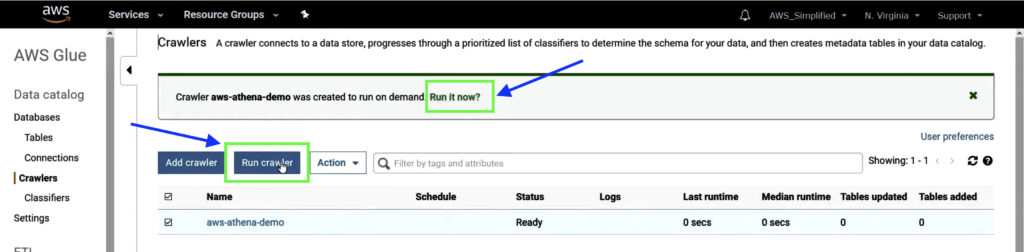
Step 5: Run AWS Glue Crawler
Run the Crawler we created in Step 4. You can either run it by clicking on the Run it now option, or select the Crawler created and click on the Run crawler button above.
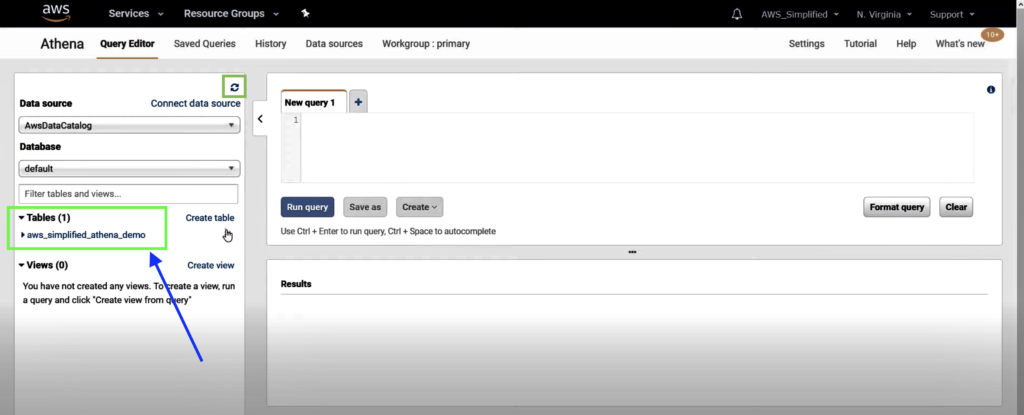
Step 6: Refresh Data Source in AWS Athena
You should now see the new table schema we created under the Tables section.
If you do not see anything, refresh the data source by clicking on the refresh button in the Data Source section.
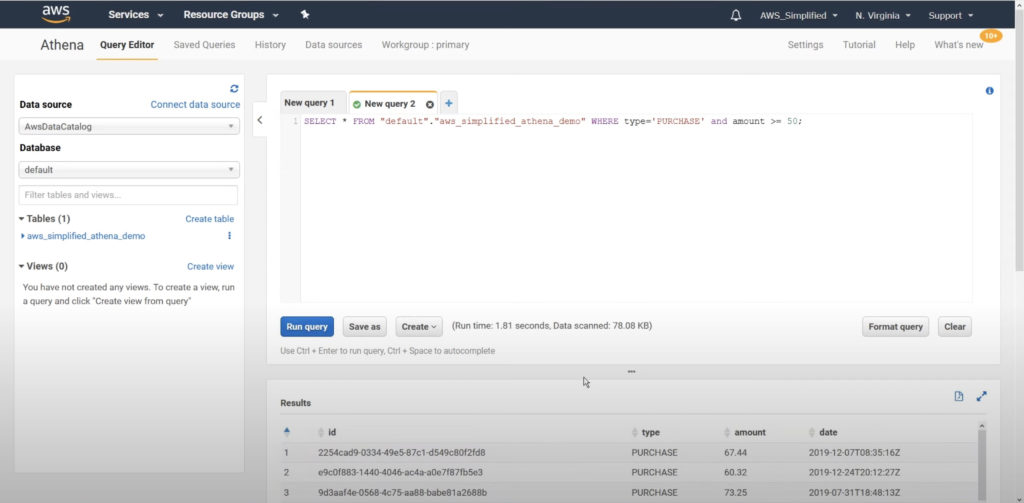
Step 7: Query Amazon S3 data using AWS Athena
Write any Standard SQL query on the table created using AWS Glue Crawler.
Here, I am just running SELECT * query to read all columns in source data object in S3 and filtering it based on certain criteria. The query will return all items with type PURCHASE with an amount greater than equal to 50.
Conclusion
You can use AWS Athena to analyze large amounts of data using Standard SQL queries directly from Amazon S3, without loading it in Athena. It only charges you for what you use!
Also, with the help of AWS Glue Crawler, you can retrieve schema of the source data using a specific data file or multiple data files at same time. Furthermore, you can update your data schema based on updated datasets by running the crawler on demand with just one click.
Sources: https://aws.amazon.com/blogs/big-data/analyzing-data-in-s3-using-amazon-athena/
You may be interested in…
Amazon S3 Select vs Athena – Whats the Difference?
AWS S3 Core Concepts – The Things You Need To Know
AWS S3 Object Lambda Tutorial
S3 Standard vs Intelligent Tiering – What’s the difference


