


In this post you will learn how to setup AWS Billing alerts in the AWS Console. I will show you how to get an email notification if your AWS spending ever goes over $5.00. This value can be easily swapped with any value you wish.
If you prefer a video format, check out this link.
Before we begin, there is one pre-requisite:
You must be signed in using your root account.
The root account is the one where you use your email address to sign in – the same email address you used to register the account. This is because the billing dashboard by default is only accessible by the root user.
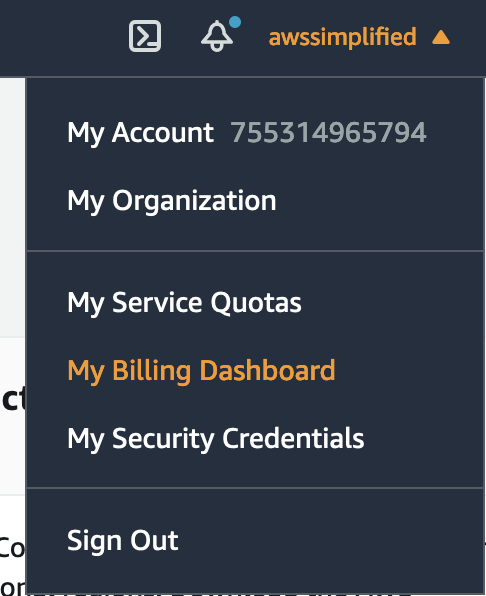
First things first, you’ll want to head over to the Billing Dashboard. To access it, go to the top right part of your browser (once signed into the console) and click on your account name as seen below. From there, click on “My Billing Dashboard”.
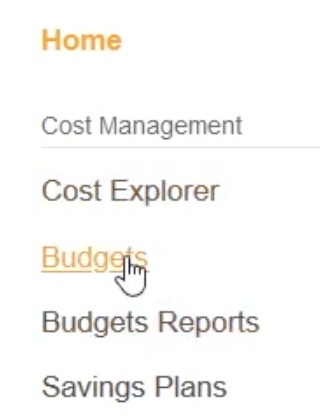
From there, we want to click the Budgets option in the left hand menu bar, as seen below.
The next page will be the AWS Budgets Home Page. If this is your first time visiting this page and you have never created a budget before, you will see a screen like below.
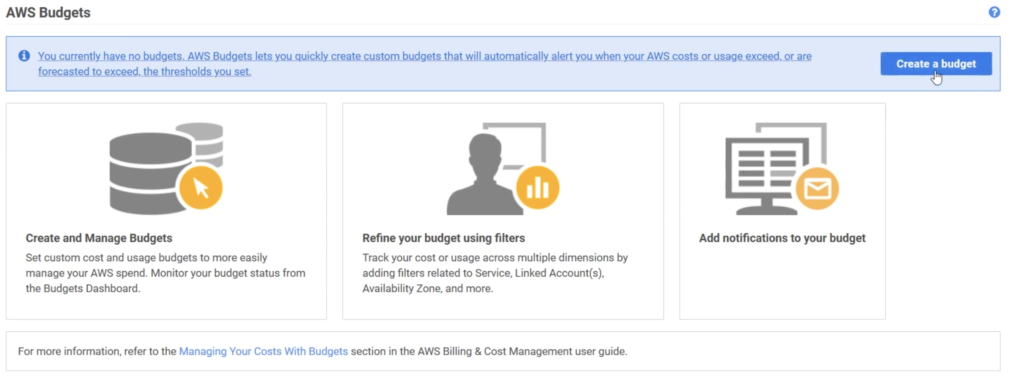
On this page, you’ll want to click the Create a Budget button in the top right corner. From there, we’ll be presented with a set of options in terms of what budget type we want to create.
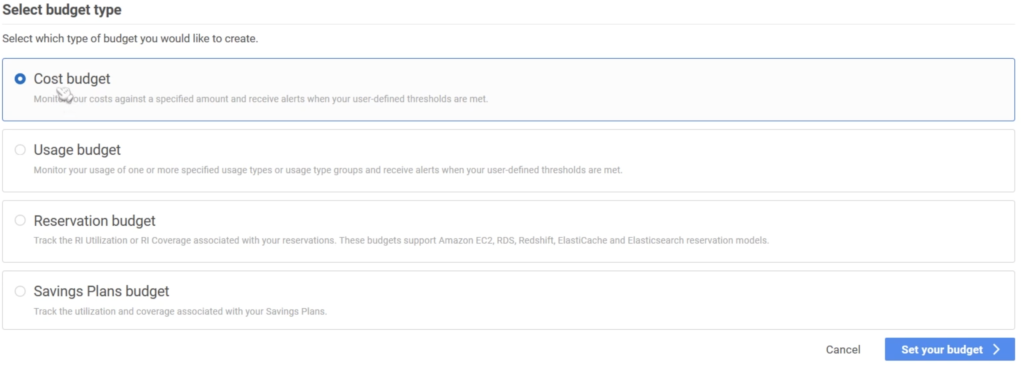
The two most common types are Cost and Usage based budgets. Cost budgets are straight forward – they are budgets for a pre-determined amount, say $5.00 or $50.00
Usage Budgets are around making budgets around particular types of AWS resources. Say for example if you were trying to limit the number of EC2 instances a user can provision.
Since we are trying to set up a dollar limit alert, we’re going to select Cost budget and click the blue Set your budget button in the bottom right – as seen in the screen shot above.
You’ll now be presented with a bunch of configuration options for your budget, as seen below.
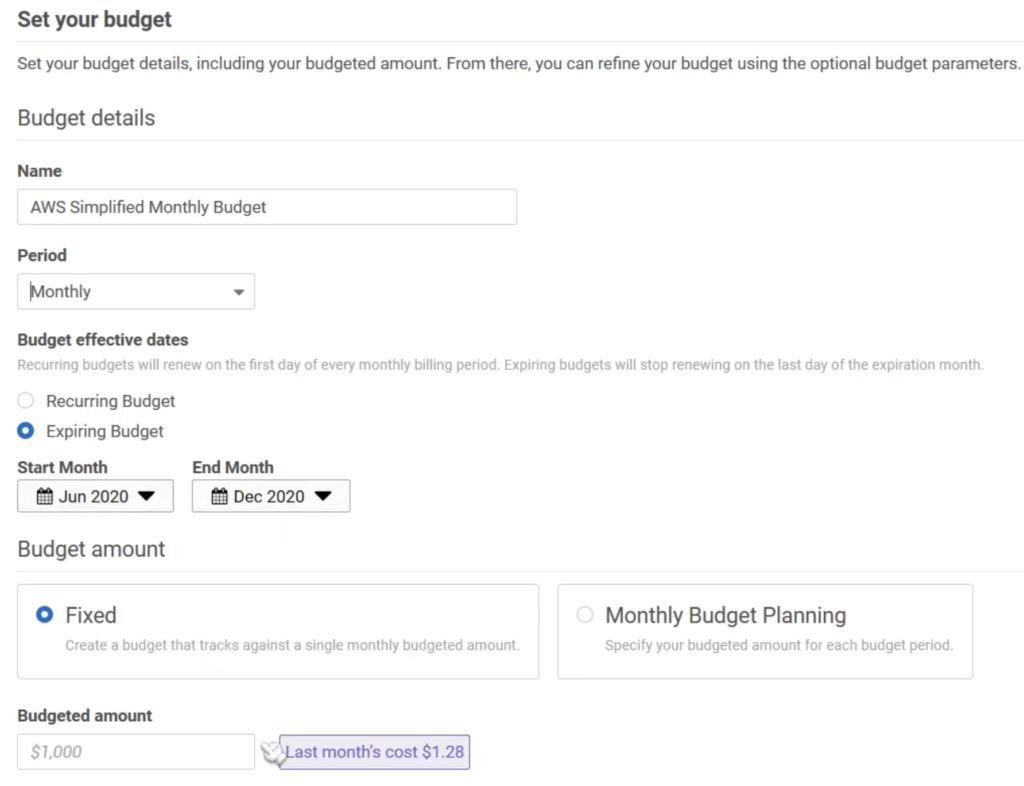
First, you’ll need to name your AWS budget.
Second, set the Period. This can range between Monthly, Quarterly or Annual budgets. Lets set this to Monthly.
In the next section, you can choose whether or not you want to be recurring every month, or just be a one time budget.
Finally, you can set whether you want to have a fixed amount budget ($5.00 total over the period) or per budget period ($5.00 every month for multiple months). Monthly makes the most sense in most cases.
From there, enter the amount you would like to budget for. In my case, I wanted to get alerted it I ever exceeded $5.00 per month, so I entered $5.00.
You can ignore the rest of the settings and scroll all the way to the bottom to click Configure Alerts as seen below.
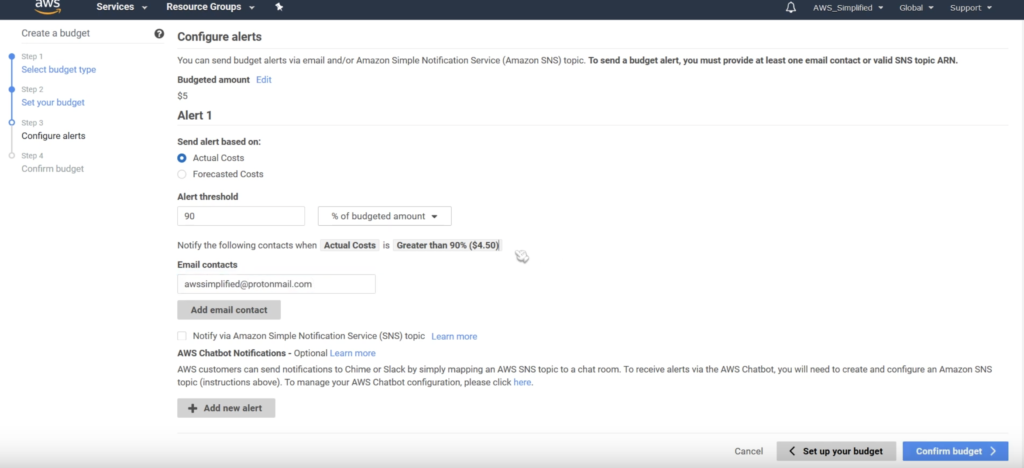
From here, we now need to configure our alert options.
Your first choice is to decide whether or not you want to be alerted when your costs actually go above the value or when your costs are forecasted to go above the value. Both of these settings have different implications so choose whatever is appropriate.
Do note though that selecting forecasted can serve as a good early warning if you ever accidentally use an AWS feature that does cost money. Also know that you can set up two different alarms, one for absolute and one for forecasted.
I’m going to select Actual Costs in this case and set the alert threshold to an Absolute Value of $5.00.
Finally, I’m going to enter the email I’d like to get the notification to if I ever go over the $5.00 limit.
After you’re done, you should have a screen filled out similar to the one below.
You can go ahead and click on Confirm Budget in the bottom right to proceed to the last step. The next screen will be a confirmation screen where you can review your settings or skip through.
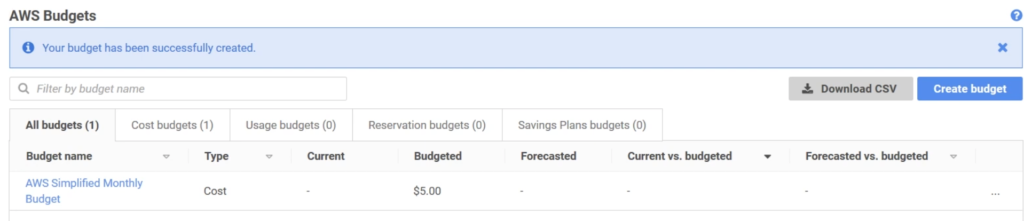
Once we’re done, we’ll see our newly created budget in the AWS Budgets section as seen below.
Congratulations, you’re done!
You’ll now receive an email notification if you ever exceed the specific $ value.


