


Looking to understand how to create a Dynamodb global secondary index? Learn about the process as well as some helpful tips in this article.
1. Overview
In this article, I’ll show you how to create and query a DynamoDB Global Secondary Index (GSI) through the AWS console. We’ll also touch on some important GSI concepts such as capacity mode, projections and configuration.
If you’re looking to query a GSI in Java, check out this article.
2.0 Starting State
Our starting state is a basic Orders table. The table contains a primary key called OrderId and a couple of other Attributes such as CustomerId, OrderDate, State, and others.
Note that in current form, we are only able to perform Queries on the OrderId field. For example, we’ll be able to ask DynamoDB for all the orders with a OrderId of ‘1’.
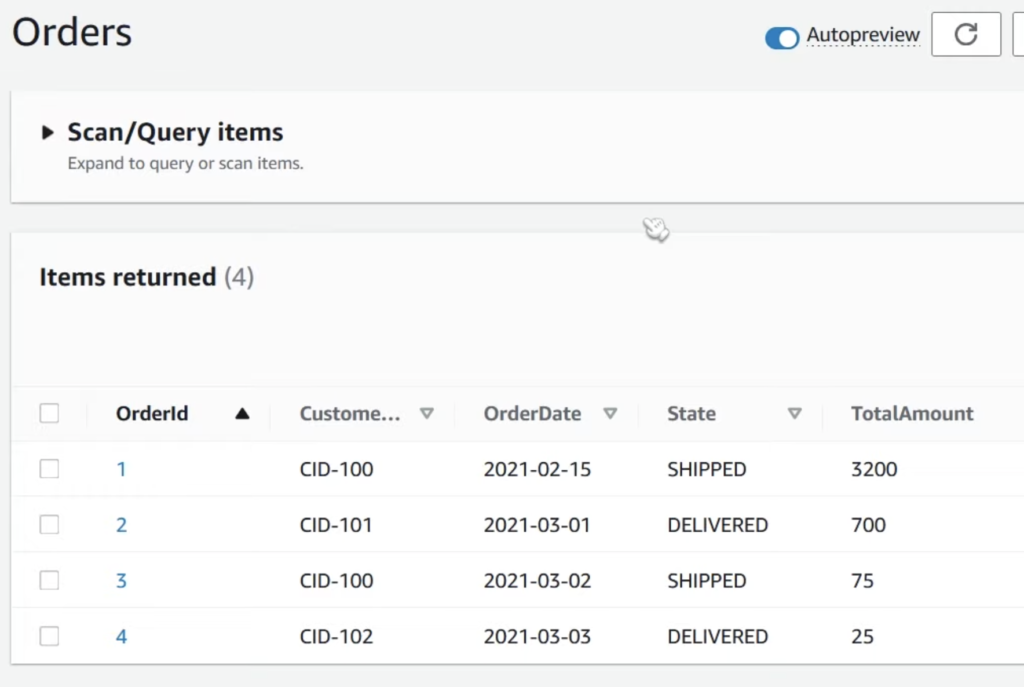
By creating a Global Secondary Index, we can avoid scanning our table by adding the ability to query directly on the CustomerId field. In other words, we will be able to retrieve all records with a CustomerId of X.
2.1 Creating a GSI
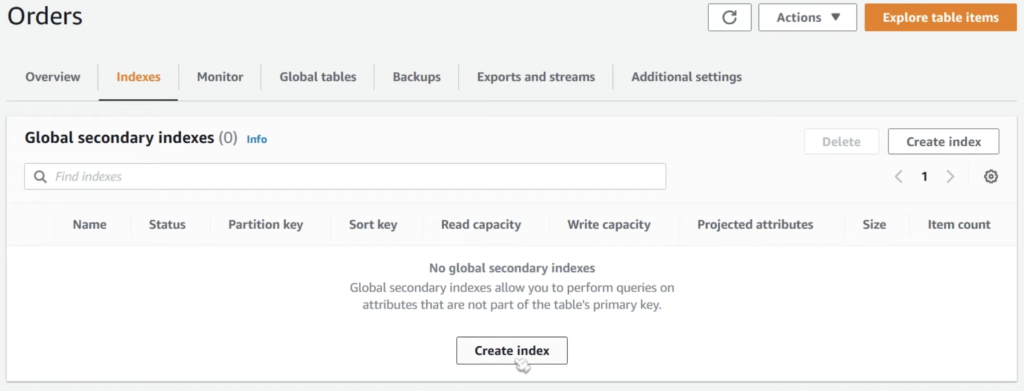
To create a Global Secondary Index in DynamoDB, head over to the console and select your Table.
You’ll want to click on the Indexes tab to access the index creation screen and click on the Create Index button as seen below.
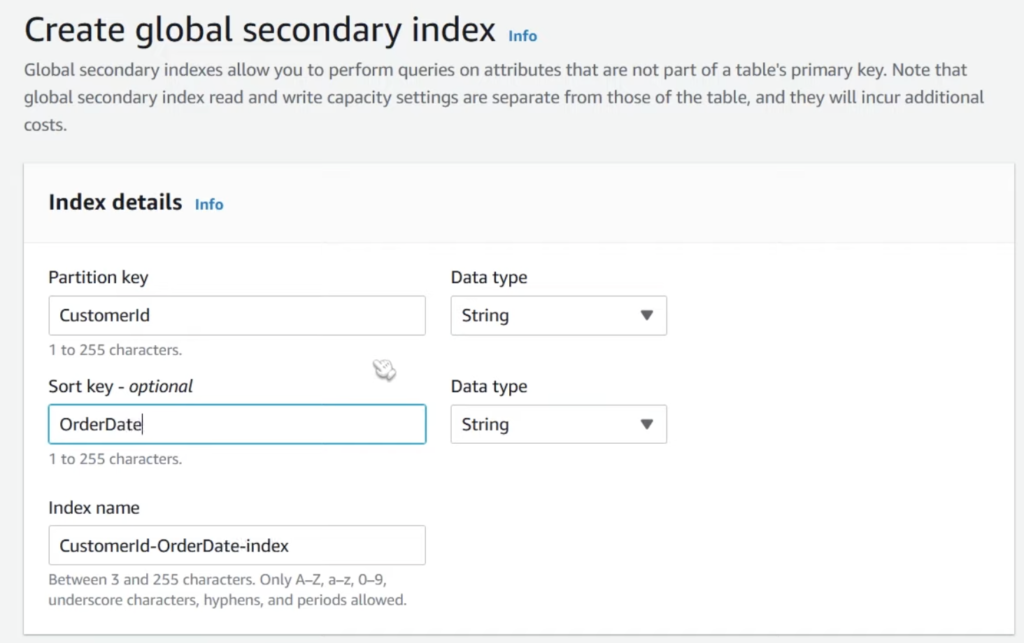
Next, we need to define the partition and optionally, the range/sort key.
Looking to become an expert in DynamoDB? Check out this article on The DynamoDB Book
Partition / Sort Key
In our case, we want to set the PartitionKey to the field we would like to query on which is CustomerId. We can also add a sort key as OrderDate to enable range-like queries on dates. For example, “Give me all the orders by this CustomerId between two OrderDates. This is a very powerful feature of GSIs and indexes in general.
We also need to define the Index Name which is just an arbitrary text field. By default the value will be the PartitionKey-Sortkey-index, as seen in the screenshot below.
Index Capacity
Scrolling down, the next section asks us about Index Capacity. By default, your GSI will inherit the settings of your main table’s index.
Another interesting note is that you are forced to use the same Capacity Mode (either On-Demand or Provisioned) that is currently configured on your main table. In other words, your GSI’s capacity mode cannot be different than your main table’s capacity mode.
Projections
Finally, we need to define our Projections setting. Projections are interesting in a number of different ways so I’d like to spend more time on them.
Projections allow you to specify the attributes that will be present alongside the index attribute you select for your GSI. This means you can restrict the number of attributes to only those you need to come alongside your queries to your GSI.
This is useful in reducing our record storage in DynamoDB. Since users are charged per RCU and WCU, keeping record sizes as small as possible saves you money.
Limiting your returned attributes are also useful in terms of network capacity. If your use case for retrieiving the data from your GSI is only to read one or two fields out of dozens, you’re effectively transferring large amounts of redundant data from client to server. This can impact API latency.
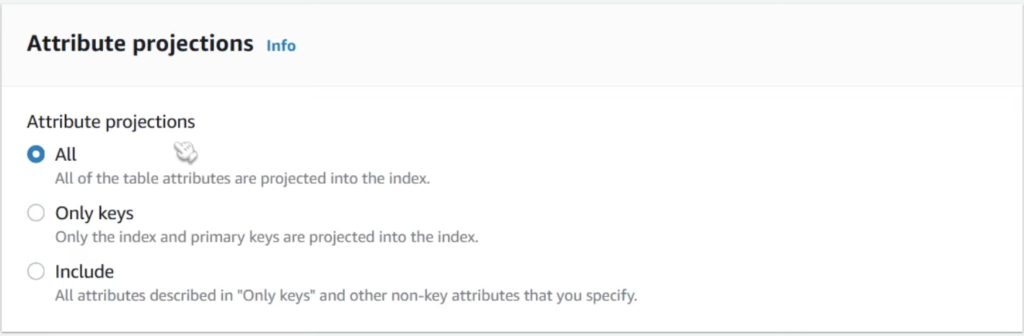
You have three options for projections as seen above.
- All – This returns all keys and values of the record
- Only Keys – This returns just the key names that are on the index (not very useful by the way).
- Include – This allows you to define a set of attributes that are included in the projection.
Finally, you can click on Create Index to start the index creation process. Typically it takes 5 minutes or less, but in the case of large tables it can take up to an hour or so in my experience.
Querying Our Global Secondary Index
Now that we’ve created our index, we are free to start querying on our Partition Key which is CustomerId in our case.
To do so from the console, head back to the Explore Items section of your DynamoDB Table.
Expand the Scan/Query tab menu and select the Table or Index dropdown as seen below.
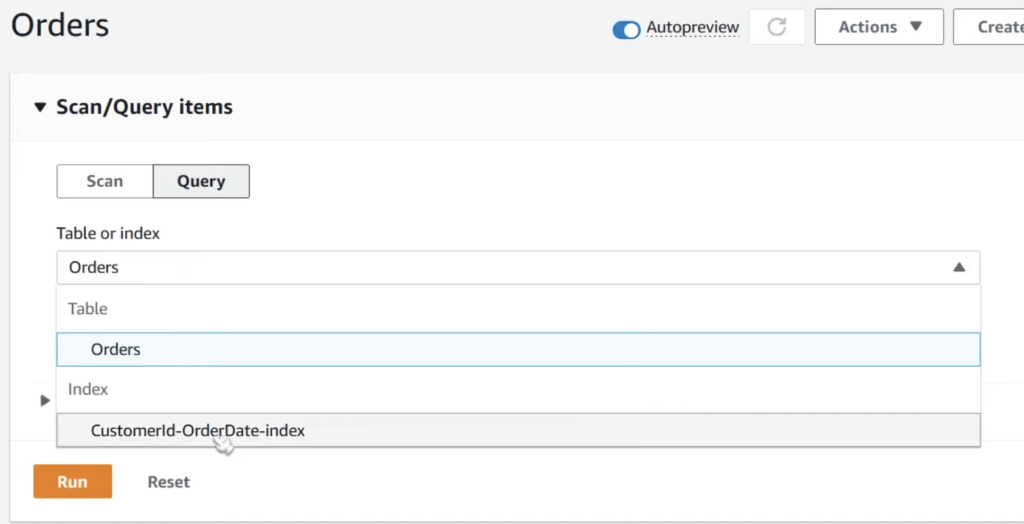
Notice that now our newly created CustomerId-Orderdate-index global secondary index is now available!
In order to perform a query against CustomerId, select the index, input the customerId, and click on run.
If you’re using a SDK such as boto3 in python, be sure to include the index name in your queries so that Dynamo knows you’re trying to query on the GSI. Not doing so will result in an error from the DynamoDB API.


