


Looking to setup S3 Object Lambda to transform your S3 data on the fly? This is the article for you.
S3 is a storage service that allows developers to store raw data. It is a cost effective data storage solution that is among AWS most popular services.
Raw data sitting in S3 is useful from a storage perspective, but what happens if we need to transform a stored object prior to retrieving it?
For example, say we have a JSON object stored in S3 that has a list of customer orders, each tagged with an OrderType field being either PURCHASE or REFUND.
If we just use S3’s typical GetObject API, we will retrieve the entire dataset including PURCHASE and REFUND entries. But what happens if we want to just retrieve PURCHASE records?
It turns out there’s a whole lot of options to perform this trivial task:
- Ask our clients to retrieve the entire object and perform client side filtering to extract either
PURCHASEorREFUNDtypes. - Perform a pre-processing step to extract the purchase and refund entries into two separate s3 objects. We can then point clients to the respective entries.
- Create an API that fronts the S3 request, downloads the S3 object, processes it, and returns it.
Options 1 and 2 are suboptimal in the security and redundancy categories. Option 3 is closest to ideal, except who wants to set up an entire API + compute layer just to process their S3 objects?
This is the exact problem that S3 Object Lambda solves. S3 Object lambda allows us to write Lambda functions that directly integrate with S3 and transform data on the fly for our clients. Clients still use a get-object API call, except they point their request to a different key and bucket combination.
This combination specifies a specific transformation to be made on the source data.
Below is a visual of the general flow Object Lambda performs.

For example, say I have a raw s3 json file called orders.json that contains PURCHASE and REFUND records, I can create two different endpoints: one that maps to just PURCHASE data, and the other that maps to just REFUND data.
Behind the scenes, we use Lambda functions to transform the data on the fly back to our caller without needing to create a new custom API.
In order to get started, we need to understand a couple key technologies we’re going to be interacting with in order to proceed with our AWS S3 Object Lambda Tutorial.
- Lambda Functions – Lambda functions are serverless compute infrastructure. They allow you to write and deploy code without having to worry about managing servers or infrastructure. This is a perfect technology to leverage for on the fly data transformations. Here is a great introductory video on AWS Lambda form my YouTube channel.
- S3 Access Points – S3 Access points make it easier to manage shared access to common data stored in S3. You can attach access points to specific S3 buckets and have specific access policies that cater to a particular use case or application. To use S3 Object Lambda, we first need to associate the data we want to transform with an Access Point. For more on the purpose and benefits of Access Points, check out this article.
- S3 Object Lambda Access Points – S3 Object Lambda Access Points allow you to transform your data when retrieving objects. When creating one, you associate it with a particular access point and lambda function that will be performing the transformation.
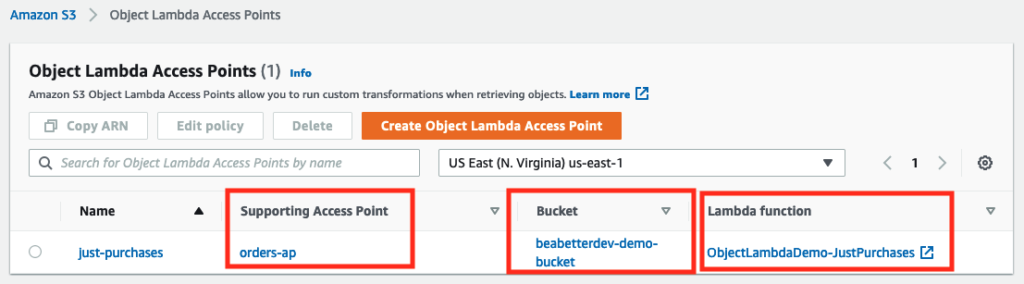
Here’s a screen grab of all these concepts tied together in the S3 Object Lambda homepage:
Now that we know a bit about the concepts we’re working with here, we need to get started in the console to set all this jazz up.
First, we need an S3 bucket that stores our source data that we would like to transform. In my case, my bucket is called beabetterdev-demo-bucket and it contains a single file called orders.json . Here is a sample of the file’s contents.
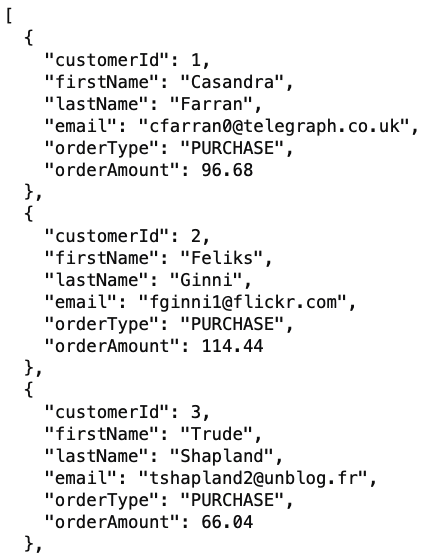
PURCHASE and REFUND. In this exercise, we’re going to create an S3 Object Lambda that transforms this source data and only returns records of type PURCHASE.
Step 1 – Create Our Access Point
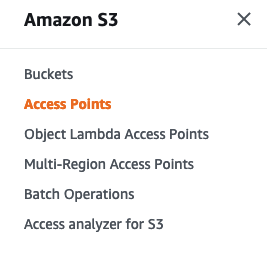
Navigate over to the AWS Console and click on the Access Points menu on the left hand panel. This should launch the Access Points home screen.
Afterwards, click on the big orange Create access point button to launch the wizard.
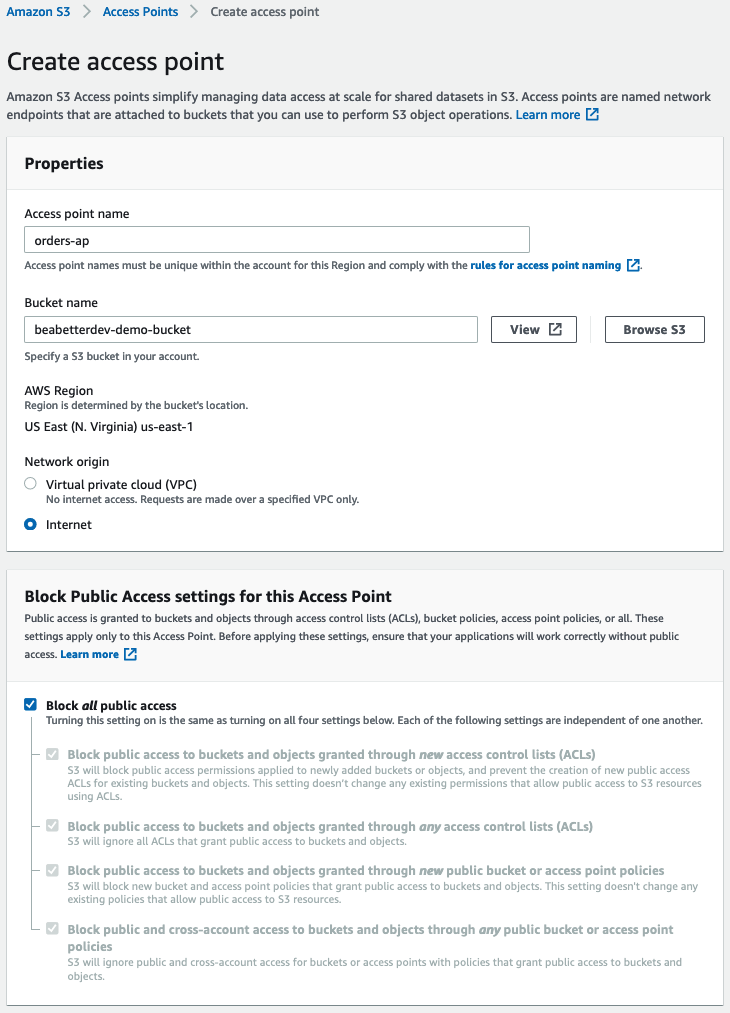
In the next page’s wizard, give your access point a relevant name. This is typically tailored to a particular application or use case.
Next under Bucket Name, either provide the name of your AWS Bucket or click on Browse S3 to launch the selection popup. Select your corresponding bucket that contains your file you’d like to link with the Object Lambda.
For Network Origin, click on Internet. This will enable your access point to be globally accessible.
If you want to expose your bucket contents to the public internet, disable all options under the Block Public Access settings for this Access Point. Alternatively, if you’re planning on exposing your access point through the use of IAM users, you can leave Block all public access as enabled.
Here’s a screen grab of the settings I’m using for my Access Point.
After we create our access point, we need to go grab our ARN for the next step. Navigate to the permissions tab of your access point and copy the ARN to a text document and set it aside. As a reference, here’s what my access point ARN looks like created in this example: arn:aws:s3:us-east-1:<accountId>>:accesspoint/orders-ap
Great, now we have an Access Point that we can link to our Object Lambda. Next, we need to go ahead and create our Lambda function in order to provide it as input in the Object Lambda Wizard. So lets go ahead and do that now.
Step 2 – Create Our Lambda Function
Head over to the AWS Lambda section of the console and click on Create Function. This should launch a simple wizard allowing you to specify your language of choice and some security settings.
For this demo, we’re going to use Python 3.9 as our programming language.
Expand the dropdown that says Change default execution role and select the Create a new role from AWS policy templates option.
Give your role a name and select the policy template with the name Amazon S3 object read-only permissions. You can leave everything else as default.
This policy will give your Lambda function the permission to read your source object (orders.json in this case) out of S3.
You’re settings should look something similar to this:
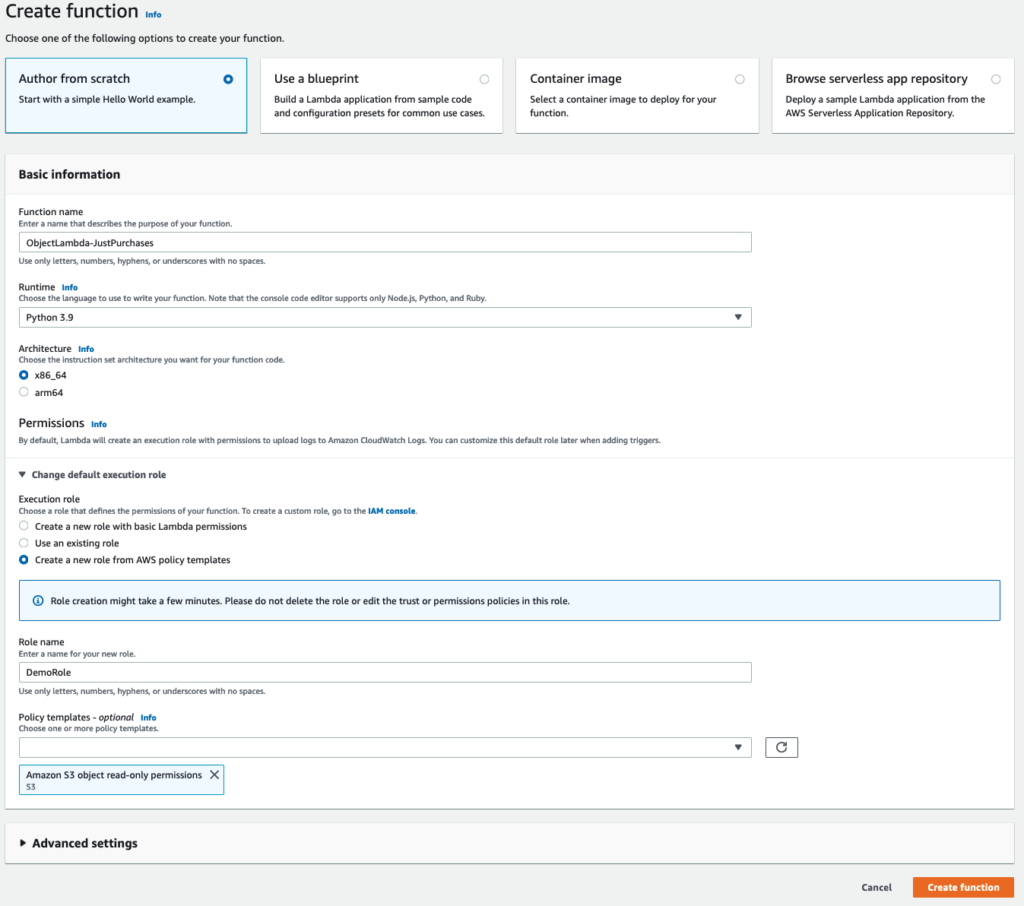
Go ahead and click Create function to move on.
Step 3 – Update Our Lambda’s Code
We now need to update our Lambda function’s code to be able to process the incoming request and transform the s3 file. The steps our Lambda function logic should take are:
- Grab the S3 URL from the incoming event
- Grab the outputRoute and outputToken from the incoming event
- Download the S3 file
- Transform the S3 file using our custom logic (extract just
PURCHASEorders in our case) - Write the object back to S3
A couple things to note here. The outputRoute and outputToken are two required parameters that you must send back to S3 as part of our final write operation. I like to think of these as scoped identifiers that tell S3 which GET request the corresponding transformation operation is matched to.
As a reference, here’s an example of an input event that gets passed in to your lambda function and is accessible in the event object.
{
    "xAmzRequestId": "1a5ed718-5f53-471d-b6fe-5cf62d88d02a",
    "getObjectContext": {
        "inputS3Url": "https://myap-123412341234.s3-accesspoint.us-east-1.amazonaws.com/s3.txt?X-Amz-Security-Token=...",
        "outputRoute": "io-iad-cell001",
        "outputToken": "..."
    },
    "configuration": {
        "accessPointArn": "arn:aws:s3-object-lambda:us-east-1:123412341234:accesspoint/myolap",
        "supportingAccessPointArn": "arn:aws:s3:us-east-1:123412341234:accesspoint/myap",
        "payload": "test"
    },
    "userRequest": {
        "url": "/s3.txt",
        "headers": {
            "Host": "myolap-123412341234.s3-object-lambda.us-east-1.amazonaws.com",
            "Accept-Encoding": "identity",
            "X-Amz-Content-SHA256": "e3b0c44297fc1c149afbf4c8995fb92427ae41e4649b934ca495991b7852b855"
        }
    },
    "userIdentity": {
        "type": "IAMUser",
        "principalId": "...",
        "arn": "arn:aws:iam::123412341234:user/myuser",
        "accountId": "123412341234",
        "accessKeyId": "..."
    },
    "protocolVersion": "1.00"
}
Next, we want to drop in our code. Here’s what mine looks like with Steps 1 through 5 commented for reference.
import boto3
import urllib3
import json

http = urllib3.PoolManager()

def lambda_handler(event, context):
    print(event)

    # 1 & 2 Extract relevant metadata including S3URL out of input event
    object_get_context = event["getObjectContext"]
    request_route = object_get_context["outputRoute"]
    request_token = object_get_context["outputToken"]
    s3_url = object_get_context["inputS3Url"]

    # 3 - Download S3 File
    response = http.request('GET', s3_url)

    original_object = response.data.decode('utf-8')
    as_list = json.loads(original_object)
    result_list = []

    # 4 - Transform object
    for record in as_list:
        if record['orderType'] == "PURCHASE":
            result_list.append(record)

    # 5 - Write object back to S3 Object Lambda
    s3 = boto3.client('s3')
    s3.write_get_object_response(
        Body=json.dumps(result_list),
        RequestRoute=request_route,
        RequestToken=request_token)

    return {'status_code': 200}
Go ahead and click on Deploy to activate your newly written code in your lambda function.
Now that we’ve successfully created and coded up our Lambda Function, our next step is to finally create our S3 Object Lambda.
Step 4 – Create Your S3 Object Lambda Access Point
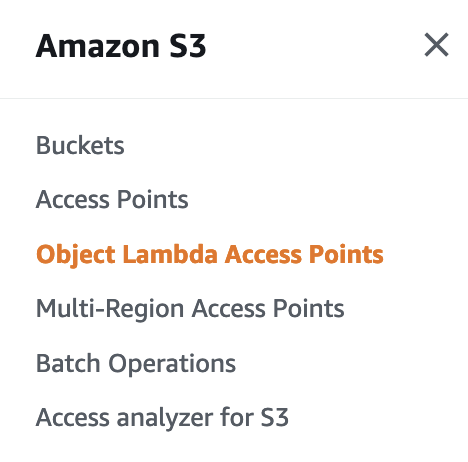
Head back over to the S3 section of the console and click on Object Lambda Access Point in the left hand side bar as seen below.
Go ahead and click the orange button saying Create Object Lambda Access Point to get started.
In the prompt, first give your object lambda a name. Second, enter the ARN of the access point you created in Step 1. Mine is arn:aws:s3:us-east-1:<accountid>:accesspoint/orders-ap. Alternatively, you can use the Browse S3 button use the wizard to select it.
Under the Lambda section, select the function that you previously created. Mine was called ObjectLambda-JustPurchases.
You can skip through all the rest of the options and click on Create Object Lambda Access Point at the bottom of the wizard.
We’re now ready to test everything out.
Step 5 – Testing With the AWS CLI
We’re going to use CloudShell (totally free) which is a neat built-in AWS terminal available to you through the AWS console. I have a whole article on CloudShell here if you’re interested in learning more about it.
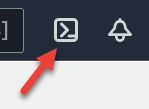
You can access CloudShell either by searching for it through the top AWS searchbar, or by clicking the obscure terminal looking icon in the top menu bar, right next to the search box, as imaged below.
Once the terminal loads, we run the following CLI command to attempt to retrieve our transformed S3 object.
aws s3api get-object --bucket arn:aws:s3-object-lambda:us-east-1:755314965794:accesspoint/just-purchases --key orders.json transformed_data.jsonThis command will call the S3 Get Object and uses our s3 object lambda + access point to field the request. Upon retrieving the results, it writes the object contents to a file on disk called transformed_data.json.
The processed data looks like the following:
[{"customerId": 1, "firstName": "Casandra", "lastName": "Farran", "email": "cfarran0@telegraph.co.uk", "orderType": "PURCHASE", "orderAmount": 96.68}, {"customerI
d": 2, "firstName": "Feliks", "lastName": "Ginni", "email": "fginni1@flickr.com", "orderType": "PURCHASE", "orderAmount": 114.44}, {"customerId": 3, "firstName":
"Trude", "lastName": "Shapland", "email": "tshapland2@unblog.fr", "orderType": "PURCHASE", "orderAmount": 66.04}, {"customerId": 4, "firstName": "Silva", "lastNam
e": "Rizzo", "email": "srizzo3@51.la", "orderType": "PURCHASE", "orderAmount": 78.54}, ... , ...]
Notice that there aren’t any REFUND orderTypes as part of our result set, woo!
Closing Thoughts
I’m glad AWS spent the time to understand how developers are commonly using their services. A feature such as S3 Object Lambda caters to a certain use case that tends to crop up fairly often in the world of application development.
I think this feature is great to know about for certain use cases and was pretty easy to set up. The reason we needed to set up an access point prior to using this feature is beyond me, but other than that the experience was positive.
I hope you learned something from this article. If you have any comments or questions please feel free to drop them down below.
Thank you!


Looks like lambda permissions aren’t updated:
[ERROR] ClientError: An error occurred (Forbidden) when calling the WriteGetObjectResponse operation: Forbidden.
…